Activity 1: build a list of articles with author details
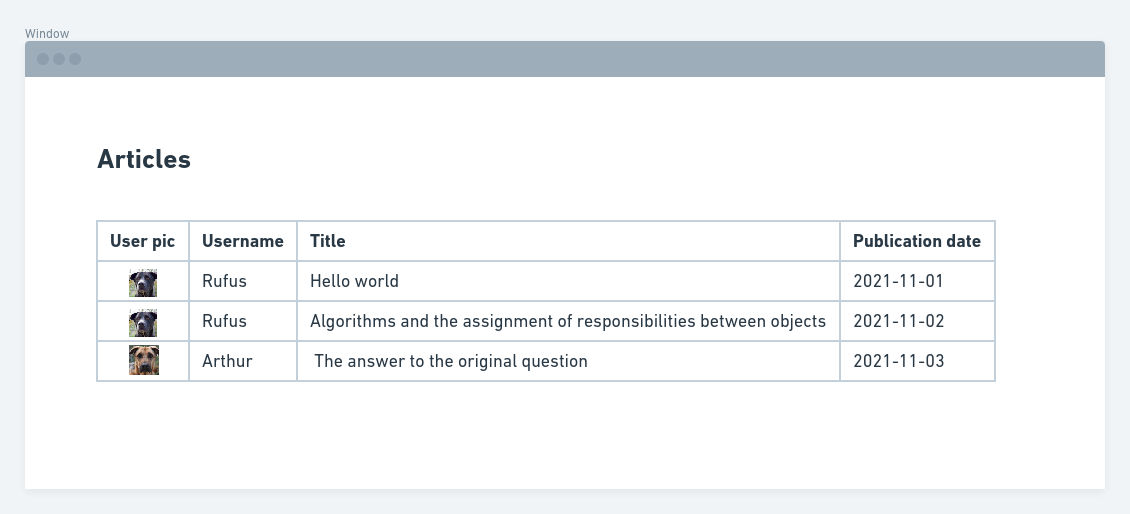
Here's a mock-up of the view you're going to create:
Step 1: basic view setup
- Create a page view of published articles
- Use the table format
By default your view will contain one field: 'title'.
Add the following field:
- Publication date (authoring date)
If you save your view and visit its path, you should see a small table containing your articles.
Step 2: add a relationship
At this point your view contains 2 fields: 'title' and authoring date'.
The two missing fields 'user picture' and 'username' are user information, so we need to create a user relationship.
The next question: the info of which user do we want to pull into this view? The currently logged in user? The site's superuser (user/1)?
The user whose info we want to pull in is the node's author, so let's see if we can figure out how to create an 'author relationship'.
→ Open your view's advanced settings and add a relationship. You can use a keyword to help you find the relationship you need:
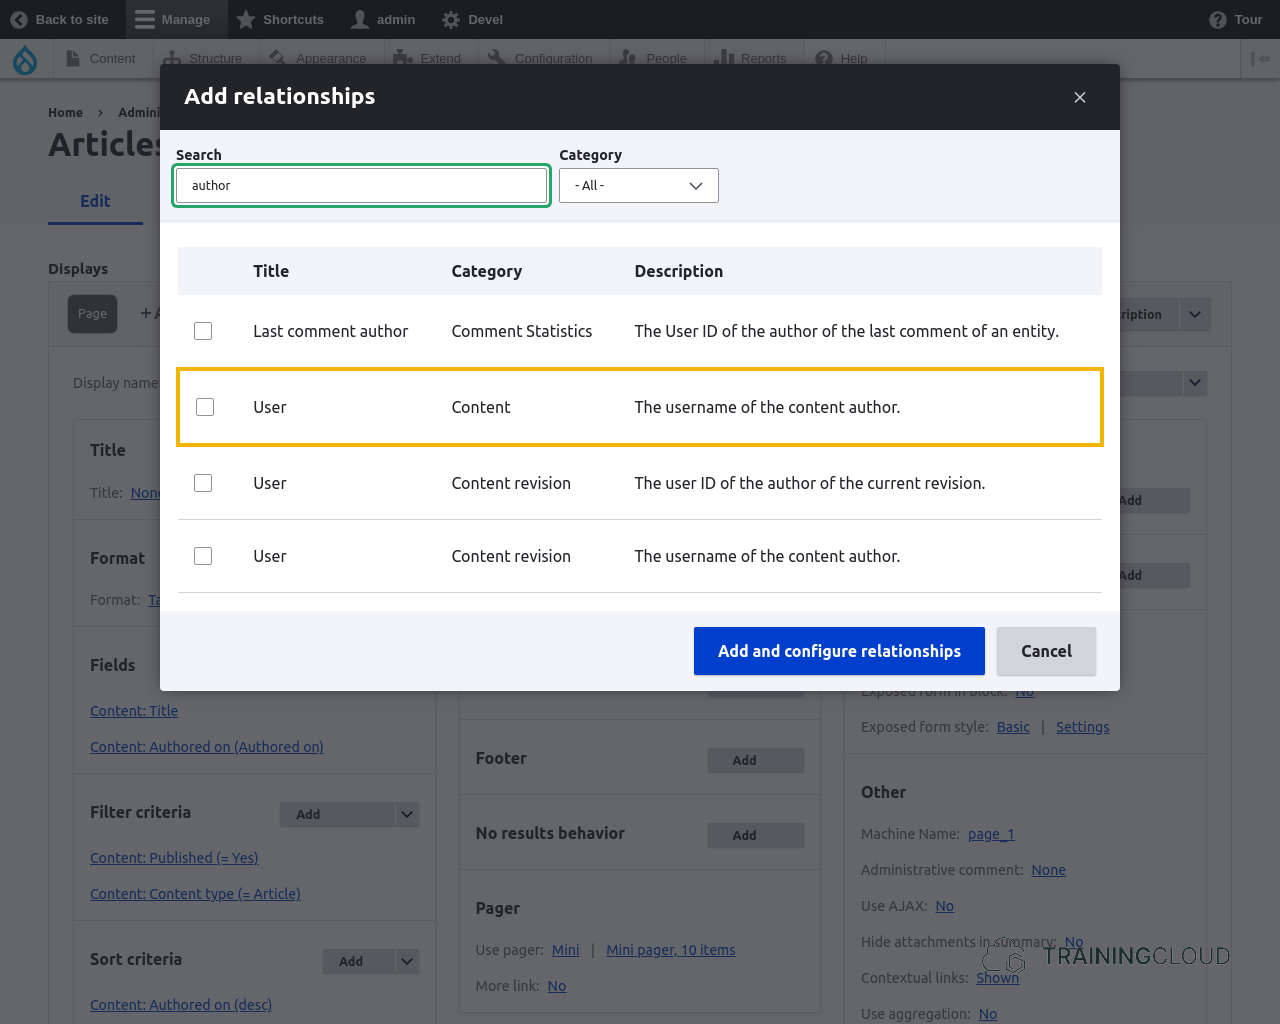
→ Select 'Content author' and click 'Add and configure relationships'.
Next you'll be asked if you want this relationship is mandatory ("require relationship"):
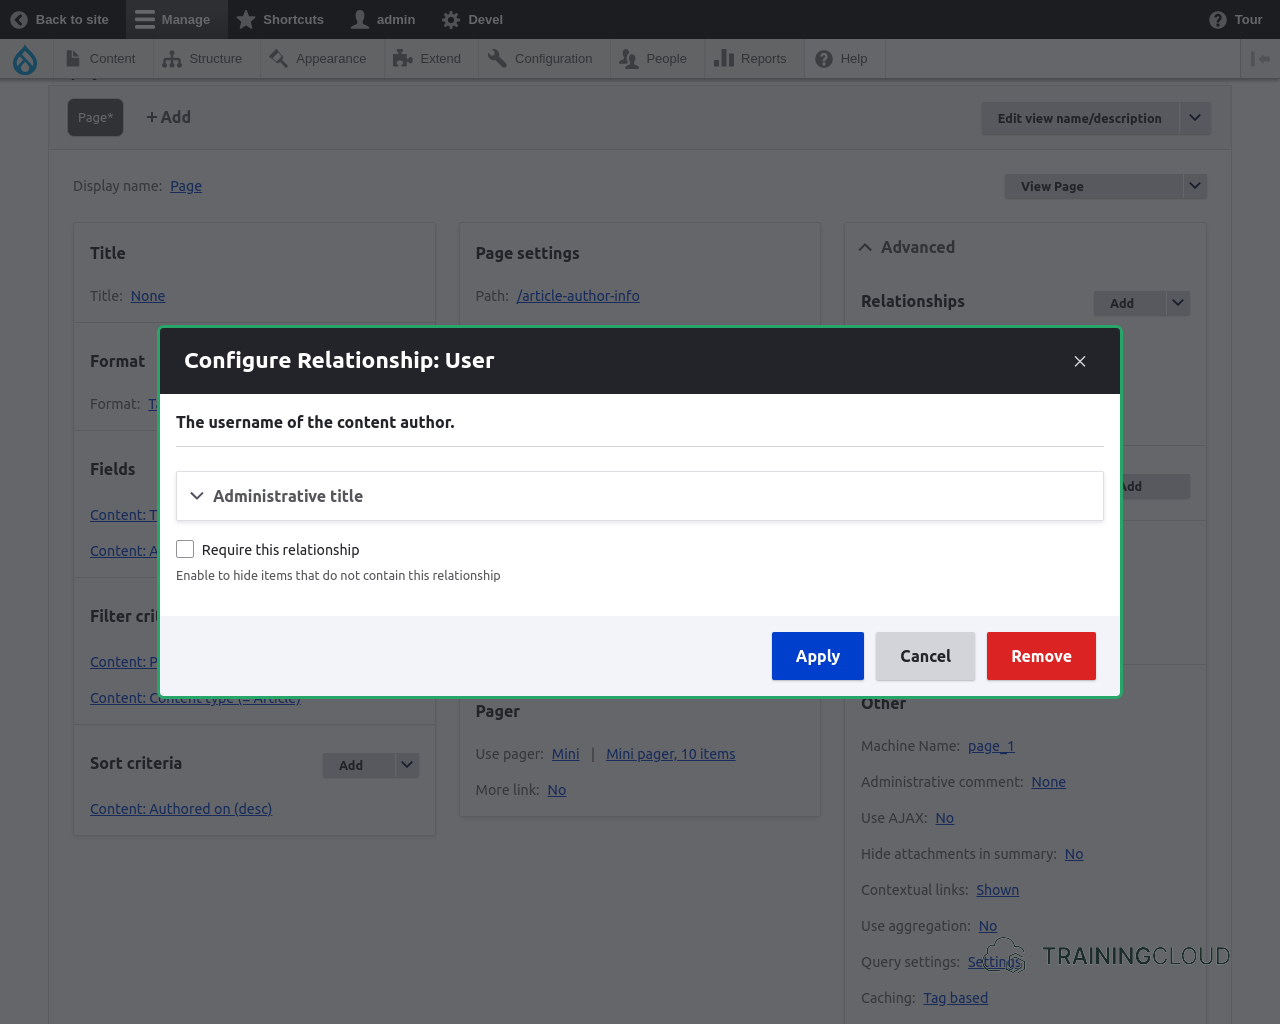
This setting lets you specify whether you want to show all articles, or only articles that actually have a referenced author.
In our case there is no difference, as all nodes have authors, and Drupal makes it impossible for nodes not to have an author.
Step 3: add and configure the related fields
Now that we have (hopefully) set up the right relationship, additional author related fields should have become available for you to add to your view.
→ In your view's configuration area for 'Fields', click 'add', find the 'name' and 'picture' fields, and add them.
Step 4: reorder your fields
The current field order is: Title - authoring date - username - user picture.
→ Reorder the fields to: User picture p username - authoring date - title.
Step 5: save and test your view
If everything went well, your view should look like this:
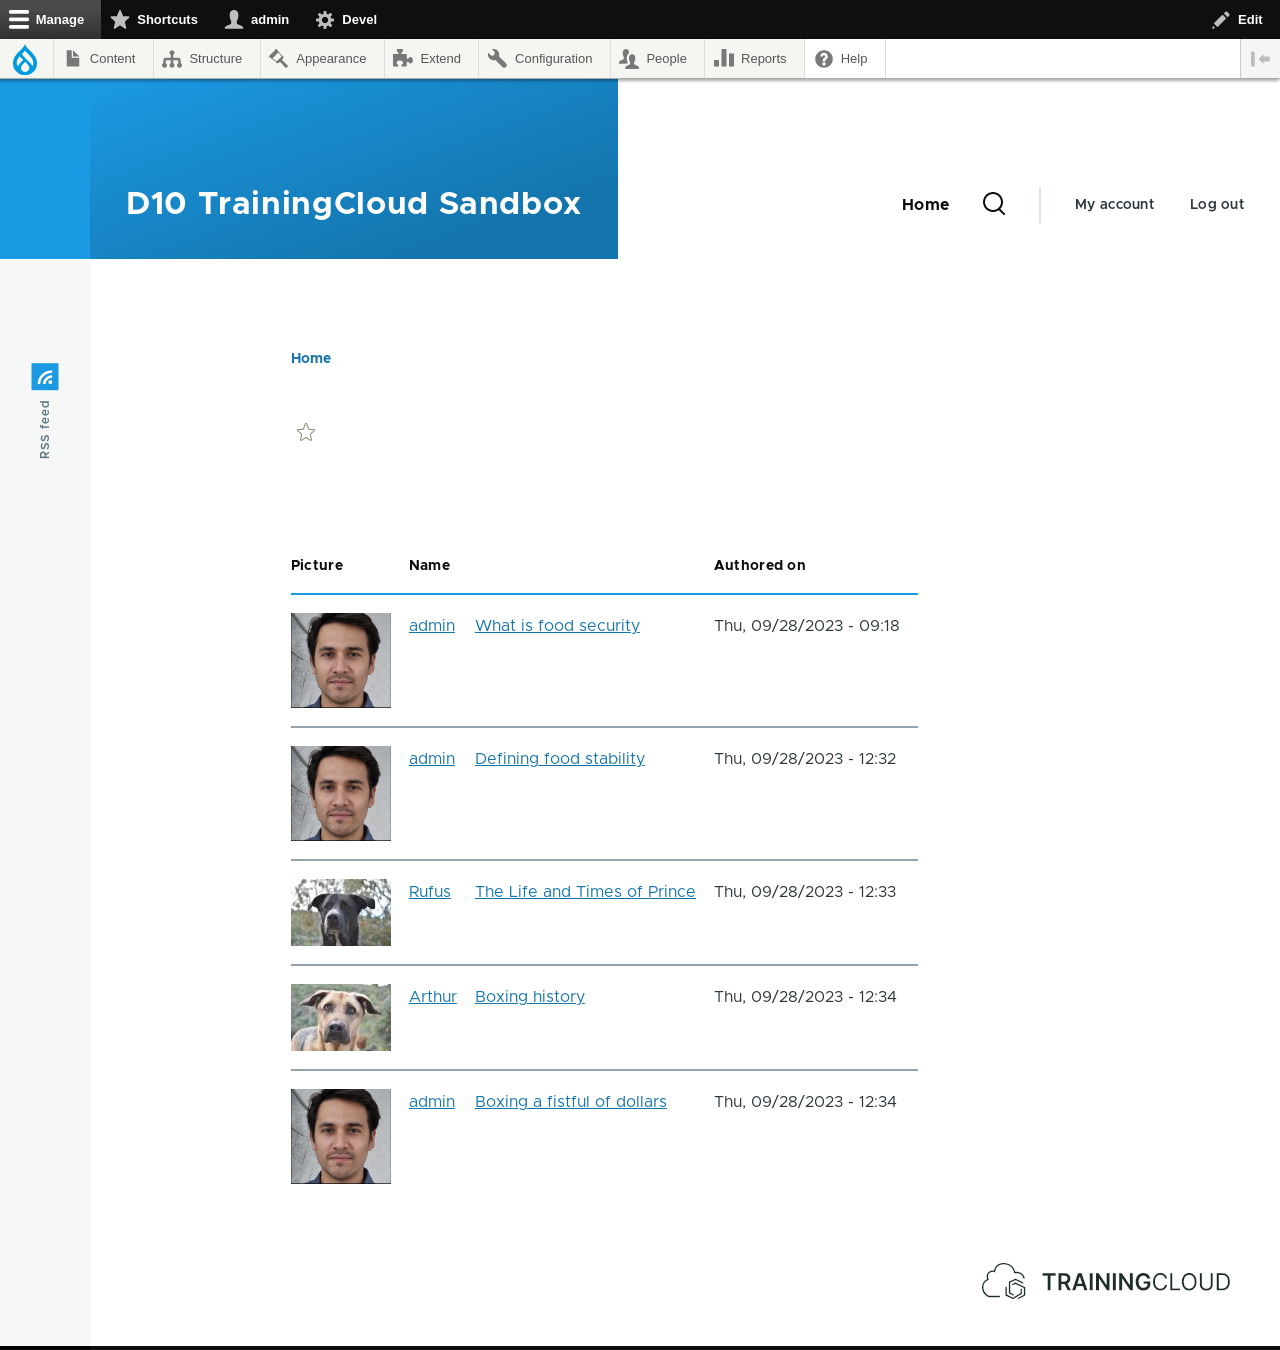
This is what we wanted to achieve, compared with the mock-up show at the beginning of this activity.
- Choose a small thumbnail size for the user picture, instead of the original size.
If you look carefully at the list of fields in your view, you should see that your two most recently added field names are prefixed with (author):
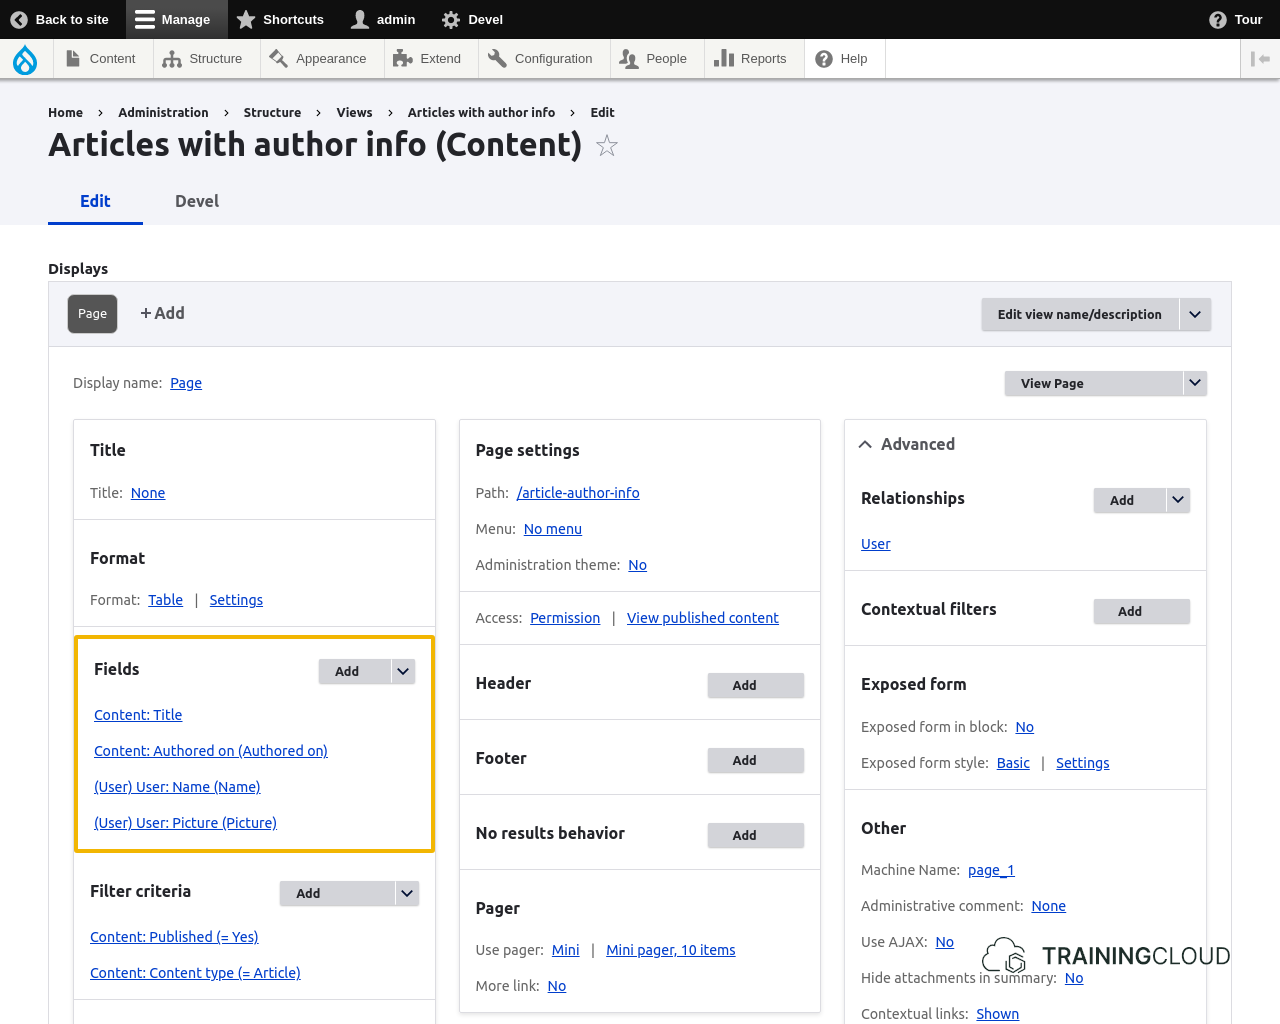
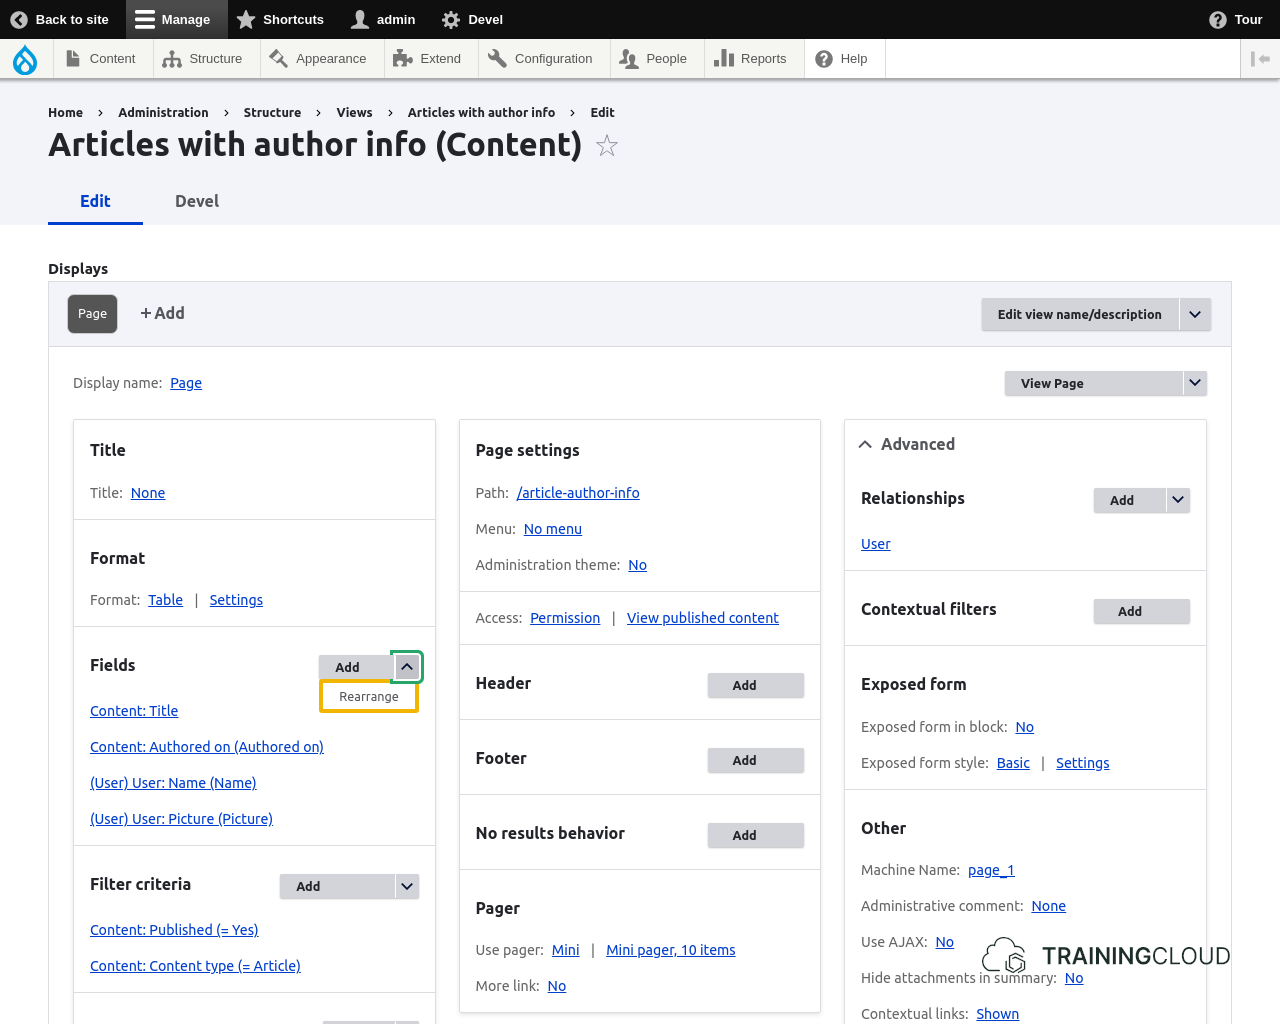
- You can rearrange fields in a view by clicking on the arrow next to the 'add' button, choosing 'rearrange', and dragging/dropping the field names: